Use Virtual Queues
Introduction
As of version 5.4.0, PLOSSYS Output Engine supports virtual queues. Virtual queues are queues that do not lead to a specific device. Instead they contain a list of queues that are possible end devices. To which queue the jobs are sent, depends on the purpose for which you have set up the queue.
Normally, the setup of queues is being done in easyPRIMA. But they can also be configured in the virtual section of the Printer Configuration File. The configuration settings depend on the type of the virtual queue.
There are three types of virtual queues:
-
A failover queue contains a list of at least two queues. As long as the initial queue is available, all jobs will be sent to it. Only if the first queue has an error, the jobs will be redirected to the second one, ensuring that all jobs can still be output.
Which issues cause a printer error largely depends on the printer manufacturer. Mostly though network errors will cause a failover, whereas a printer being out of paper won't. In case of an error, the whole job will be printed anew.
-
A loadbalancer queue contains a list of queues. Incoming jobs will be distributed randomly across the available assigned queues. If a queue isn't available, the loadbalancer redirects the jobs to one of the remaining queues. In this case the loadbalancer also works as failover.
-
A router queue contains a list of at least two queues. Each listed queue needs a condition specified on which this queue is used as output queue. This could be, for example, print color or format.
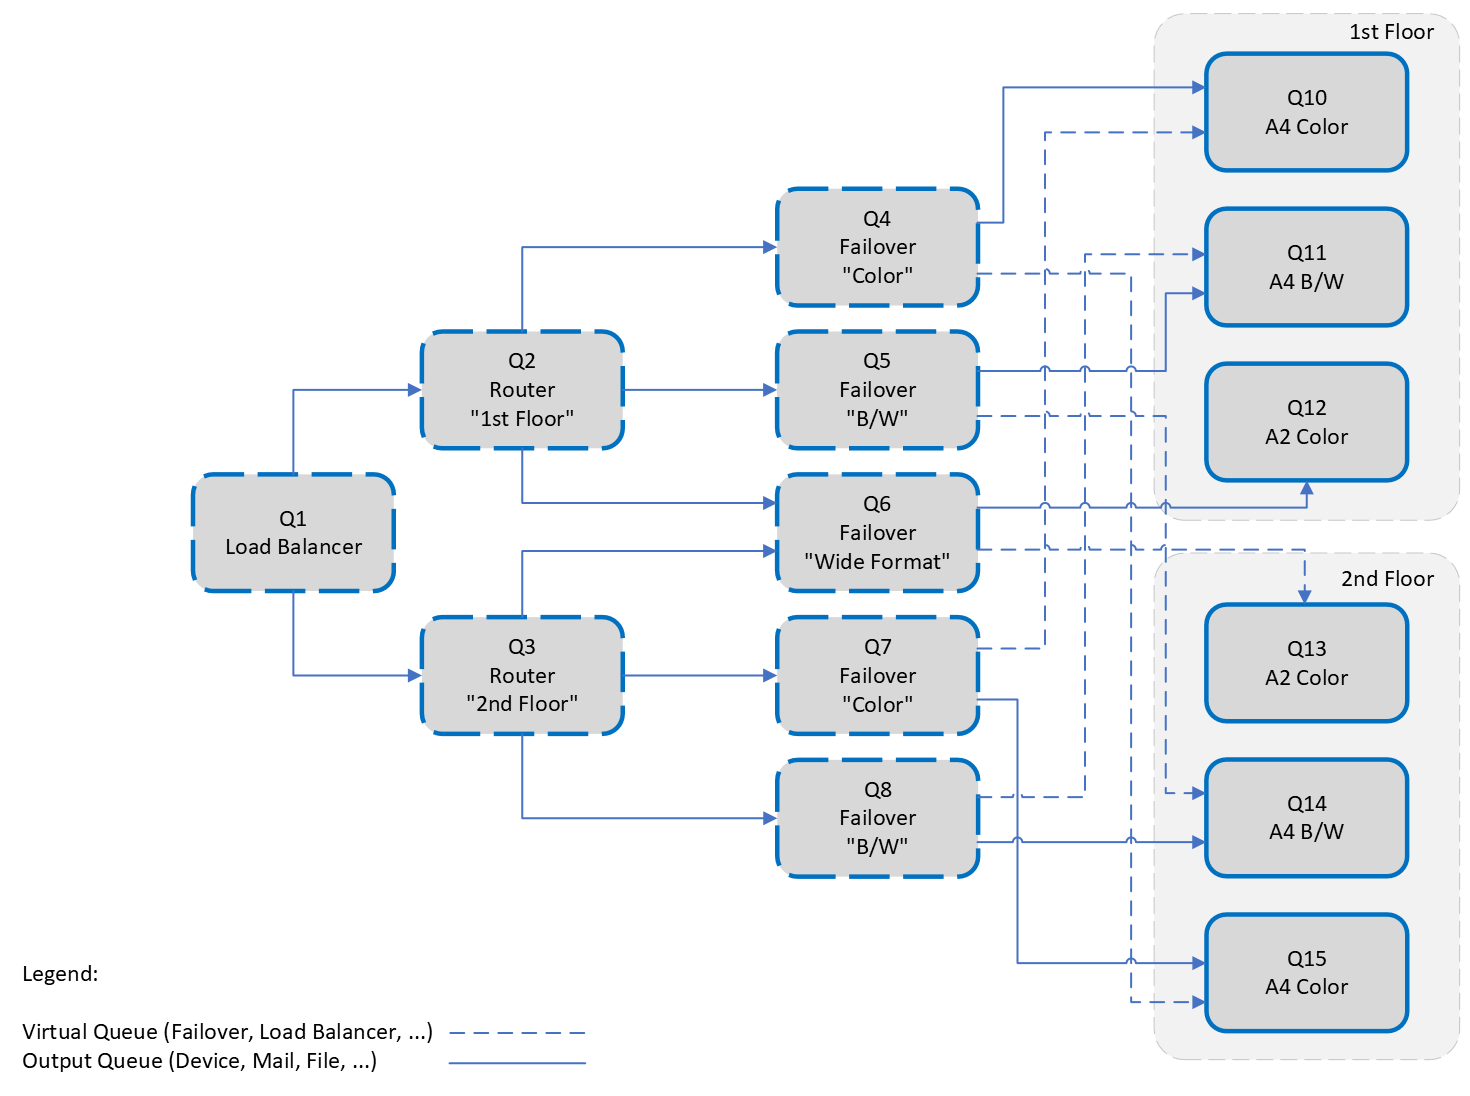
In PLOSSYS Administrator, virtual queues are displayed by a distinct icon in the printer view: 
Failover Queue
To set up a failover queue in easyPRIMA:
-
Go to
Manage Queuesand create a new virtual queue:
-
In the
Common Paramaterstab, enter at least a name for the new queue.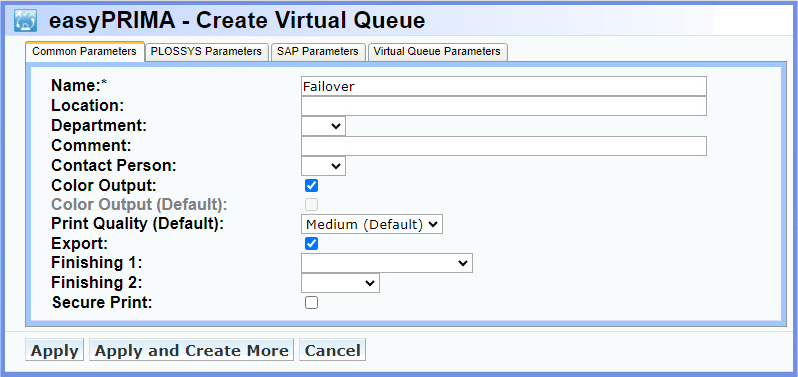
-
In the
Virtual Queue Parameterstab, selectfailoveras virtual queue type.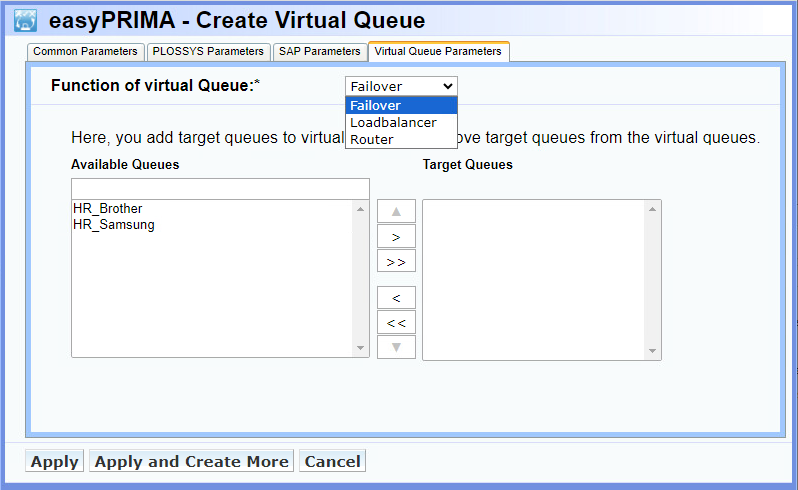
-
Add at least two printer queues to the virtual queue.
-
Press
Applyto finish the setup.
To create a failover queue by a printer configuration file and PLOSSYS CLI:
-
Create a YAML file with the configuration of the virtual queue.
-
Open a PowerShell and validate the YAML file.
plossys printer validate <printer_config_file>.yml -
Import the YAML file into PLOSSYS Output Engine.
plossys printer import <printer_config_file>.yml
Literature
For a detailed description of all available parameters, refer to the Printer Keys documentation.
Example - failover queue
- printer: myFailoverQueue
  connection: 'virtual://'
  template:
    virtual:
      type: 'failover'
      queues:
        - printer1
        - printer2
Loadbalancer Queue
To set up a loadbalancer queue in easyPRIMA:
-
Go to
Manage Queuesand create a new virtual queue: -
In the
Common Paramaterstab, enter at least a name for the new queue.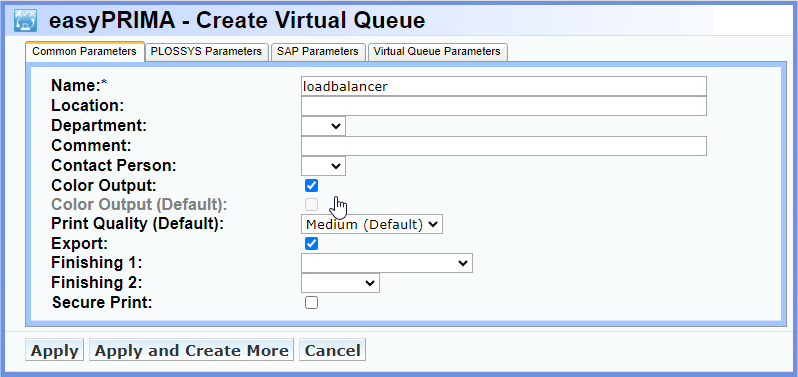
-
In the
Virtual Queue Parameterstab, selectloadbalanceras virtual queue type.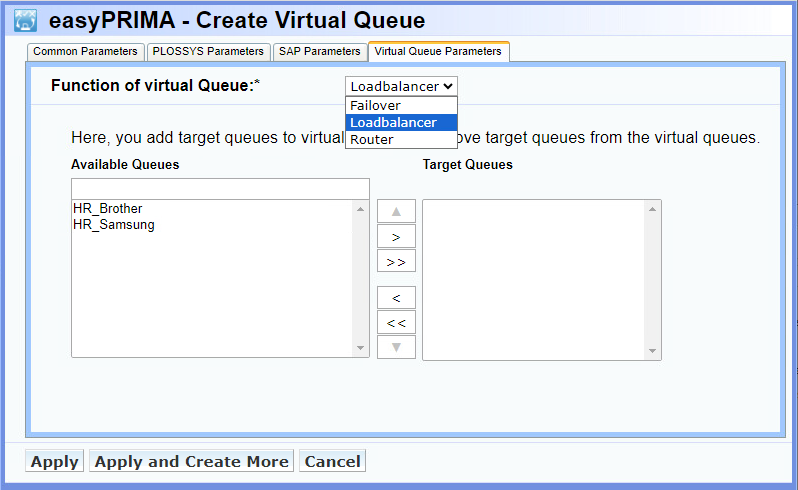
-
Add at least two printer queues to the virtual queue.
-
Press
Applyto finish the setup.
To create a loadbalancer queue by a printer configuration file and PLOSSYS CLI:
-
Create a YAML file with the configuration of the virtual queue.
-
Open a PowerShell and validate the YAML file.
plossys printer validate <printer_config_file>.yml -
Import the YAML file into PLOSSYS Output Engine.
plossys printer import <printer_config_file>.yml
Literature
For a detailed description of all available parameters, refer to the Printer Keys documentation.
Example - loadbalancer queue
- printer: myLoadbalancerQueue
  connection: 'virtual://'
  template:
    virtual:
      type: 'loadbalancer'
      queues:
        - printer3
        - printer4
Router Queue
To set up a router queue in easyPRIMA:
-
Go to
Manage Queuesand create a new virtual queue: -
In the
Common Paramaterstab, enter at least a name for the new queue.
-
In the
Virtual Queue Parameterstab, selectrouteras virtual queue type.
-
Add at least two printer queues to the virtual queue.
-
Press
Apply. EasyPRIMA will now promt you to enter the conditions for each queue.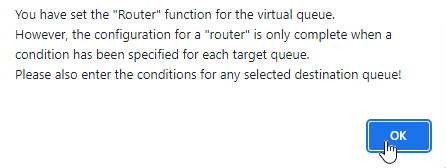
-
Enter the needed conditions and press
Applyagain to finish the setup.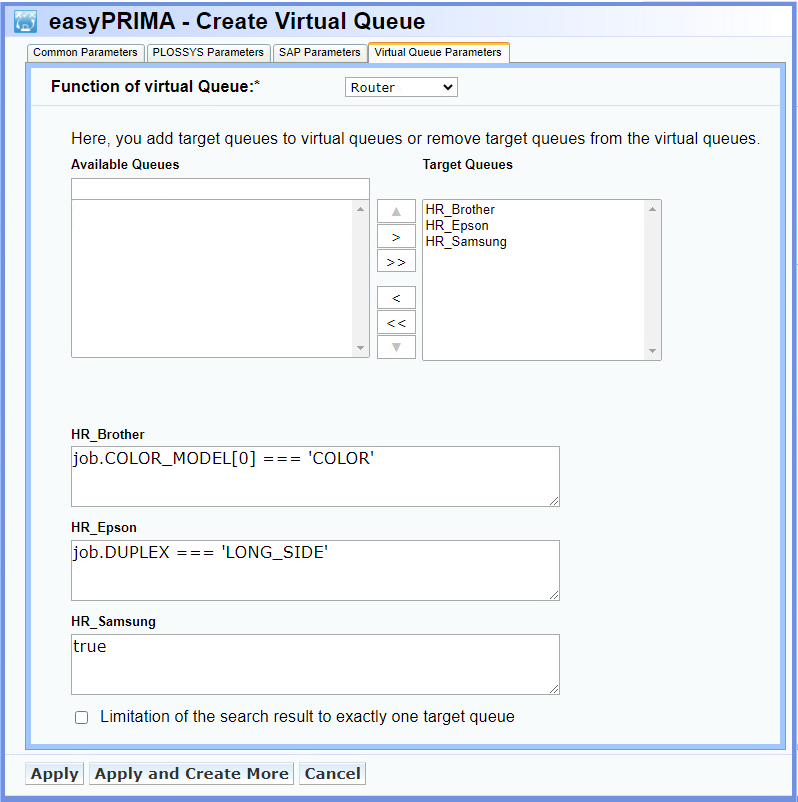
In this example, color jobs go to the first queue, duplex b/w jobs go to the second, and all others go to the third queue.
To create a router queue by a printer configuration file and PLOSSYS CLI:
-
Create a YAML file with the configuration of the virtual queue.
-
Open a PowerShell and validate the YAML file.
plossys printer validate <printer_config_file>.yml -
Import the YAML file into PLOSSYS Output Engine.
plossys printer import <printer_config_file>.yml
Literature
For a detailed description of all available parameters, refer to the Printer Keys documentation.
Hint - PDF page sizes
If your router queue has to manage PDF files by size, you need to set ANALYZE_PDF_PAGE_SIZES as true. For all other file types, the router queue configuration works as it is.
Example - routing by color and duplex
- printer: myRouterQueue1
  connection: 'virtual://'
  template:
    virtual:
      type: 'router'
      routes:
          # Color jobs go to printer1
        - condition: job.COLOR_MODEL[0] === 'COLOR'
          queue: printer1
          # Duplex b/w jobs go to printer2
        - condition: job.DUPLEX === 'LONG_SIDE'
          queue: printer2
          # All other jobs go to printer3
        - condition: true
          queue: printer3
Example - routing by size and color
- printer: myRouterQueue2
  connection: 'virtual://'
  template:
    virtual:
      type: 'router'
      routes:
          # Color jobs with a size less or equal DIN A4 go to printer1
        - condition: job.getMaxPage().le('a4') && job.COLOR_MODEL[0] === 'COLOR'
          queue: printer1
          # Gray-scaled jobs with a size less or equal DIN A4 go to printer2
        - condition: job.getMaxPage().le('a4') && job.COLOR_MODEL[0] === 'GRAY'
          queue: printer2
          # Jobs with a size larger than DIN A4 go to printer3
        - condition: true
          queue: printer3
Example - strict router queue
- printer: myRouterQueue3
  connection: 'virtual://'
  template:
    virtual:
      type: 'router'
      strict: true
      routes:
          # Jobs with a size less or equal DIN A4 go to printer 1
        - condition:job.getMaxPage().le('a4')
          queue: printer1
          # All other jobs go to printer2
        - condition: true
          queue: printer2