Secure Consul
For security reasons, we strongly recommend configuring the TLS encryption.
Caution - firewall
Due to everyone who can access the Consul Web interface via port 8500 can change the configuration including the user authorization, we strongly recommend protecting Consul via firewall. Only the Output Engine servers and maybe the workstations of the system administrators should have access to Consul.
Hint - TLS encryption for required software
Please also refer to the following documentations regarding TLS encryption:
Configure the TLS Encryption
The connection to Consul is secured by the TLS certificate located in the C:\ProgramData\SEAL Systems\config\tls directory. That means that after you have replaced the self-signed certificate enclosed in delivery by your own certificate in Secure Internal Output Engine Services the connection to Consul has already been secured.
Configure the TLS Encryption in a Cluster
If you are running PLOSSYS Output Engine in a cluster, execute the configuration steps above on all Output Engine servers.
Config a Consul Key in a Cluster
For how to configure Consul in a cluster, refer to Configure Consul in a Cluster.
The communication between the Consul instances in a cluster is encrypted symmetrically. A pre-shared key is installed.
Caution - security gap
Using the pre-installed key in a productive system is a serious security gap.
Show the Installed Keys
This is how you display all keys known to the Consul cluster:
-
Open a PowerShell (Administrator). Set the following environment variables (only on one server in case of a cluster):
set CONSUL_HTTP_SSL=true set CONSUL_HTTP_SSL_VERIFY=false -
Change to the directory of the Consul program:
cd C:\Program Files\SEAL Systems\seal-consul-agent -
List the installed keys:
.\consul.exe keyring -listHint - active key
The active key is highlighted.
GfTiHCQsAMdYyUKN+BYhMw==is the default key set during the installation.
Replace the Key
This is how you replace the key:
-
Open a PowerShell (Administrator). Set the following environment variables (only on one server in case of a cluster):
set CONSUL_HTTP_SSL=true set CONSUL_HTTP_SSL_VERIFY=false -
Change to the directory of the Consul program:
cd C:\Program Files\SEAL Systems\seal-consul-agent -
Create a new symmetric key:
.\consul.exe keygenThe new key
<new_key>is displayed. -
Distribute the new key in the Consul cluster:
.\consul.exe keyring -install <new_key> -
Activate the new key:
.\consul.exe keyring -use <new_key> -
Delete the old key:
.\consul.exe keyring -remove <old_key>
Specify a CA Certificate (Unnecessary in Most Cases)
If a CA certificate has been specified, Consul requires a client certificate from each client, that means from all Output Engine services. This would require corresponding properties of the certificate and would be a high effort. A complete explanation of how to use client certificates is beyond the scope of this documentation.
For the rare other cases, this is how you configure a CA certificate with Consul:
-
Open the Consul configuration file on the Output Engine server:
C:\ProgramData\SEAL Systems\config\consul.json -
Insert the following lines in the first level, for example, after the first opening bracket:
{
  "ca_file": "C:\\ProgramData\\SEAL Systems\\config\\tls\\ca.pem",
  "verify_outgoing": true,
...
}
Caution - JSON structure
Pay attention to keep the JSON structure in the configuration file! For further information, refer to http://json.org/json-de.html.
-
Save the configuration file.
-
Restart the
seal-consul-agentservice:Restart-Service seal-consul-agent
Configure ACL
Literature - Consul documentation by HashiCorp
For an in-depth documentation refer to the Consul documentation by its developer HashiCorp, especially the section about ACL parameters.
Consul comes without ACL (Access Control List) configuration. This is how you configure ACL:
-
Stop PLOSSYS 5 completely using the
--fullparameter (on every server in case of a cluster).plossys service stop --full -
Open the Consul configuration file on the Output Engine server (on every server in case of a cluster):
C:\ProgramData\SEAL Systems\config\consul.json -
Insert the following lines in the first level, for example after the first opening bracket (on every server in case of a cluster):
{ "acl": { "enabled": true, "default_policy": "deny", "enable_token_persistence": true }, ... } -
Start the
seal-consul-agentservice (on every server in case of a cluster):plossys service start seal-consul-agent -
Open a Command Prompt (Administrator) or PowerShell (Administrator). Set the following environment variables (only on one server in case of a cluster):
-
when using a Command Prompt:
set CONSUL_HTTP_SSL=true set CONSUL_HTTP_SSL_VERIFY=false -
when using a Power Shell
$Env:CONSUL_HTTP_SSL='true'
$Env:CONSUL_HTTP_SSL_VERIFY='false'
You have to use the same window for all command line commands from this step going forward.
-
-
Change to the directory of the Consul program (on every server in case of a cluster):
cd C:\Program Files\SEAL Systems\seal-consul-agent -
Execute ACL bootstrap (only on one server in case of a cluster):
.\consul.exe acl bootstrapThis results in an output like this:
AccessorID:       770956ae-f0bf-db1d-0dc0-c802b9fdea3a
SecretID:         145d39a6-1366-7e3b-496e-fd2f2ea6ae23
Description:      Bootstrap Token (Global Management)
Local:            false
Create Time:      2022-01-18 14:33:38.1674571 +0100 CET
Policies:         00000000-0000-0000-0000-000000000001 - global-management
Take a note of the SecretID of this ACL Bootstrap token.
-
Open the Consul user interface, select
Tokensin the sidebar menu and clickLog inon the top right (only on one server in case of a cluster):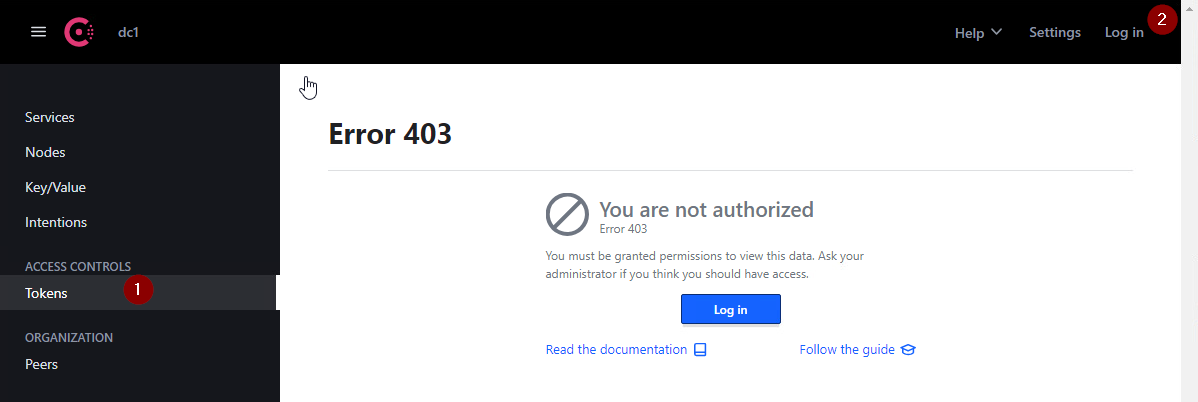
Hint - access to Web interface
Every administrator who wants to change the Output Engine configuration has do this in his browser. Otherwise, he will no longer be able to access the keys and values.
-
Enter the
SecretIDof the ACL Bootstrap token (in the example above,145d39a6-1366-7e3b-496e-fd2f2ea6ae23) (only on one server in case of a cluster):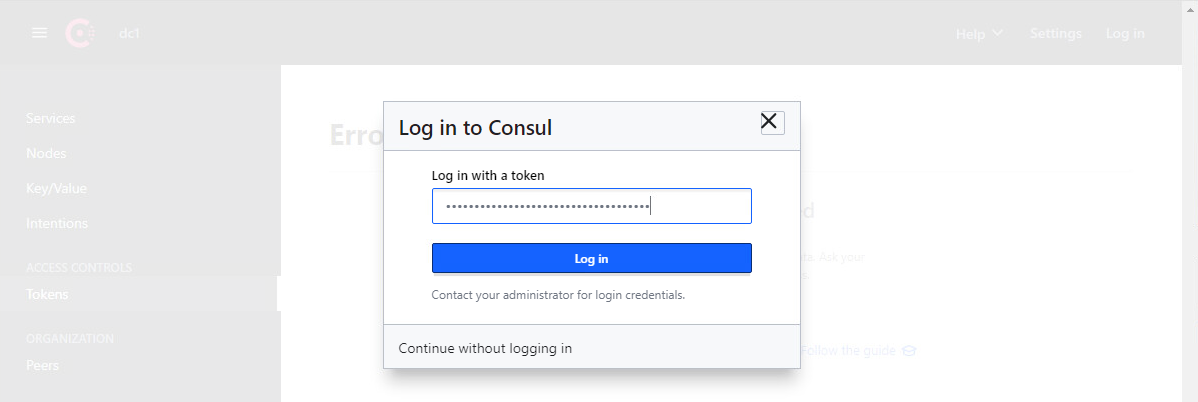
-
In the sidebar menu, change to
Key/Value. Edit or create thedc/home/env/service/any/tag/any/CONSUL_TOKENkey. Set theSecretIDof the ACL Bootstrap token (in this example,145d39a6-1366-7e3b-496e-fd2f2ea6ae23) as the value of the key. (Do this only on one server in case of a cluster.)
-
Open the envconsul configuration file on the Output Engine server (on every server in case of a cluster):
C:\ProgramData\SEAL Systems\config\envconsul.json -
Change the value of
consul.tokento theSecretIDof the ACL Bootstrap token (in this example,145d39a6-1366-7e3b-496e-fd2f2ea6ae23) (on every server in case of a cluster):{ "consul": { "address": "127.0.0.1:8500", "ssl": { "enabled": true, "verify": false }, "token": "145d39a6-1366-7e3b-496e-fd2f2ea6ae23", "retry": { "attempts": 0 } }, "sanitize": true, "upcase": true, "vault": { "renew_token": false }, "kill_signal": "SIGTERM" } -
Restart the
seal-consul-agentservice (on every server in case of a cluster):
Restart-Service seal-consul-agent
-
To enable the services to make DNS requests create the
dns-request-policy.hclfile in any directory with the following content (only on one server in case of a cluster):node_prefix "" { policy = "read" } service_prefix "" { policy = "read" } query_prefix "" { policy = "read" } -
Execute the following command to create the policy for DNS requests, using the
SecretIDof the ACL Bootstrap token as token (in this example,145d39a6-1366-7e3b-496e-fd2f2ea6ae23) (only on one server in case of a cluster):.\consul.exe acl policy create -name "dns-requests" -rules @<arbitrary directory>\dns-request-policy.hcl -token 145d39a6-1366-7e3b-496e-fd2f2ea6ae23This results in an output like this:
ID: 4e9cbd04-f18c-237b-6357-e5f6f405b74b Name: dns-requests Description: Datacenters: Rules: node_prefix "" { policy = "read" } service_prefix "" { policy = "read" } query_prefix "" { policy = "read" } -
Execute the following command to create the token for DNS requests, using the
SecretIDof the ACL Bootstrap token as token (in the example above,145d39a6-1366-7e3b-496e-fd2f2ea6ae23) (only on one server in case of a cluster):.\consul.exe acl token create -description "Token for DNS Requests" -policy-name dns-requests -token 145d39a6-1366-7e3b-496e-fd2f2ea6ae23This results in an output like this:
AccessorID:       31dee823-61b7-a8ca-fec1-9103ea601a15
SecretID:         9e3f8b90-1c48-1899-8fed-55c94dab6016
Description:      Token for DNS Requests
Local:            false
Create Time:      2022-01-31 14:08:31.5254338 +0100 CET
Policies:
   4e9cbd04-f18c-237b-6357-e5f6f405b74b - dns-requests
Take a note of the SecretID of this ACL token for DNS requests.
-
Execute the following command to set the default token (on every server in case of a cluster). Provide
- the
SecretIDof the ACL Bootstrap token with the-tokenparameter (in this example,145d39a6-1366-7e3b-496e-fd2f2ea6ae23) and - the
SecretIDof the newly created ACL token for DNS requests as the string at the end (in this example,9e3f8b90-1c48-1899-8fed-55c94dab6016).
.\consul.exe acl set-agent-token -token 145d39a6-1366-7e3b-496e-fd2f2ea6ae23 default "9e3f8b90-1c48-1899-8fed-55c94dab6016"This results in an output like this:
ACL token "default" set successfully - the
-
Execute the following command (on every server in case of a cluster) to set the agent token. Provide the
SecretIDof the ACL Bootstrap token with the-tokenparameter and as the string at the end (in this example,145d39a6-1366-7e3b-496e-fd2f2ea6ae23):.\consul.exe acl set-agent-token -token 145d39a6-1366-7e3b-496e-fd2f2ea6ae23 agent "145d39a6-1366-7e3b-496e-fd2f2ea6ae23"This results in an output like this:
ACL token "agent" set successfully -
Start PLOSSYS Output Engine (on every server in case of a cluster).
Start-Service seal-mongodb seal-natsplossys service start