Remote Printing
Introduction
As of version 6.0.0, PLOSSYS Output Engine can be used to print jobs at remote sites.
Advantages:
- central printer configuration at the main site
- central logging
- simple installation at remote sites
- no IT infrastructure needed at remote sites
- no separate PLOSSYS Output Engine at the remote site
- no changes to the firewall at remote sites
- no VPN needed
- secure (authentication via API keys per default or client certificates)
The following picture shows part of the PLOSSYS infrastructure with the new remote site connection:

Logging and PLOSSYS Administrator
When a job is printed on a remote site, the remote site's name appears in every log entry of this job, for example "remoteSite": "Inari".
Remote printers are marked with an R in PLOSSYS Administrator. ![]()
Requirements
- PLOSSYS Output Engine as of version 6.0.0
- easyPRIMA
- custom API keys or client certificates for each remote site
Main Site Configuration
Given the fact that the remote site is outside the companies firewall (on premise installation) or not in the cloud (cloud installation) a secure way of authenticating the remote site at the main site is crucial.
There are two alternatives for authentication. You can either use API key authentication (default) or client certificates authentication.
API Key Creation
You will get the custom API keys for the remote sites from your Project Engineer at SEAL Systems or you can create the API keys with PLOSSYS CLI.
The API key file will contain two sets of secrets per island (aka remote site): one for the island and one for the mainland. The file will also contain a general decryption secret used to decrypt API keys during authentication.
Example of an API key file
{
    "Inari": {
        "island": {
            "REMOTE_SITE": "Inari",
            "DECRYPTION_SECRET": "5063e3561b76ec1a545cfe957288e254276d37b7c66720ebbd65f519a0134fe3",
            "IV": "c22c5c805241262da6bd9e451230e867",
            "ENCRYPTED_API_KEY": "25c80bd41288e2e4512a654275063e371b76ec1a5695545cfe60134fe326230edd37b7c667c22867220ebbd65f519ac5"
        },
        "mainland": {
            "IV": "86cca6b2020e8651234552412c2d7d9e",
            "ENCRYPTED_API_KEY": "4ebb519ac51063e371b288d65febd2a60427576ec1a5634545cfe60004fe326530edd37b7c667c628611282e45125c10"
        }
    },
    "Hoppu": {
        "island": {
            "REMOTE_SITE": "Hoppu",
            "DECRYPTION_SECRET": "76ec3e3661b76e672045cfe957286720276d7b7c678acebbd65fb49a01d4b28",
            "IV": "9e4512a65c80bd4126230edc5c228672",
            "ENCRYPTED_API_KEY": "15056bd65f51288e2e45519ac37b7c6612a6542554563e371b76ec1995c80bd4acfe4c1e326230edd7c22867220eb34f"
        },
        "mainland": {
            "IV": "a1cc5e8651234652a6b102412c9d7d0a",
            "ENCRYPTED_API_KEY": "3e34ebb519ac510671b288d6a60427576ec1a567c667c62834545cfe61204fe326530edd37b711282e45125c105febd2"
        }
    },
    "general": {
        "DECRYPTION_SECRET": "dbda0985b2e08a3c687a9b20f80bd837fe3650da1393508462ab0b8cae5ef4d"
    }
}
API Key Configuration
Using Consul
The following example describes the API key configuration via SEAL PLOSSYS CLI. Due to the complex nature of the AUTH_CLIENTS key, it might be better to use Consul instead.
Do not use a pipe | when entering data for AUTH_CLIENTS via Consul!
-
Open a Command Prompt or PowerShell.
-
Export the complete configuration of PLOSSYS Output Engine from Consul to a YAML file with the following command. So you're making sure, current configuration settings are being used.
plossys config export <filename>.yml --insecure -
Edit the exported file
.yml. -
In the
envsection, specify the following mandatory keys for themainland-checkoutservice:-
AUTH_CLIENTS: JSON. Array of remote sites. Each site has these subkeys:REMOTE_SITE: name of the remote site as used for the API key generationENCRYPTED_API_KEY: mainland API key for the remote siteIV: mainland IV for the remote site
-
DECRYPTION_SECRET: general decryption secret
... env: service: mainland-checkout: tag: any: AUTH_CLIENTS: | [ { "REMOTE_SITE": "Inari", "ENCRYPTED_API_KEY": <mainland_encrypted_api_key_for_Inari>, "IV": <mainland_IV_for_Inari> }, { "REMOTE_SITE": "Hoppu", "ENCRYPTED_API_KEY": <mainland_encrypted_api_key_for_Hoppu>, "IV": <mainland_IV_for_Hoppu> }, ] DECRYPTION_SECRET: "dbda0985b2e08a3c687a9b20f80bd837fe3650da1393508462ab0b8cae5ef4d" ... -
-
Add optional keys as needed:
AUTH_TYPE: authentication type. (default:apiKey)CONSUL_TOKENCONSUL_URLISLAND_PORT: port the remote site clients can connect to (default:2119)LOG_LEVELLPR_ENCODINGMONGO_PRINTERS_URLMONGO_REMOTE_SITES_URLSERVICE_URLSOCKET_CLOSE_TIMEOUTSOCKET_CLOSE_TIMEOUT_IS_JOB_ERRORSOCKET_TIMEOUT
-
Save the
<filename>.ymlfile. -
Re-import it to Consul.
plossys config import <filename>.yml --insecure
Client Certificates (Main Site)
As an alternative to Api Keys the remote sites can authenticate themselves against the main site with client certificates.
When issuing a client certificate for a remote site, the name of the remote site has to be used as the CN.
-
Open a Command Prompt or PowerShell.
-
Export the complete configuration of PLOSSYS Output Engine from Consul to a YAML file with the following command. So you're making sure current configuration settings are being used.
plossys config export <filename>.yml --insecure -
Edit the exported file
.yml. -
In the
envsection, specify the following mandatory keys for themainland-checkoutservice: -
Save the
<filename>.ymlfile. -
Re-import it to Consul.
plossys config import <filename>.yml --insecure -
Continue with Printer Configuration
Printer Configuration
Creating a remote site printer is basically the same as creating a main site printer. The only difference is an additional key remoteSite.
-
Create a queue for the remote printer in easyPRIMA.
-
Set the IP address of the remote printer as
Output Destination, for example 192.168.178.39. -
Move the queue parameter
REMOTESITEfrom theHIDDENto thePLOSSYStab.Enter the name of the remote site.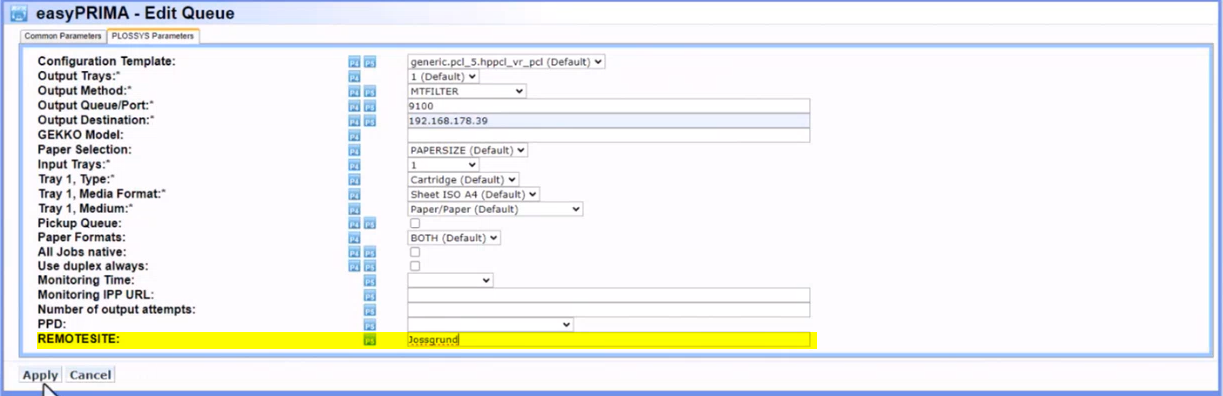
No typos
The name of the remote site has to be exactly the same as used to create the API keys and as specified in the mainland configuration.
EasyPRIMA documentation
As of version 1.10.1, easyPRIMA comes with a preconfigured
REMOTESITEparameter for queues as described above. If you use an older version of easyPRIMA, add the parameter manually. For more information, refer to easyPRIMA, System Description, Chapter 12 Queue Data, Add Customer-Specific Parameters. -
Confirm with
Apply. -
Export the data to PLOSSYS Output Engine.
-
Continue with Remote Site Installation.
Remote Site Installation
The remote site installer provides the seal-island-checkout service and writes the connection details to the registry.
API Keys
-
Download the installation file for the
seal-island-checkoutfrom the SEAL Systems delivery platform. -
Start the client installation.
-
Linux: If you have a YAML configuration file, save it as
/opt/seal/etc/seal-island-checkout.yml. Execute the installer.Example of
seal-island-checkout.ymlenv: SERVICE_URL: "http://localhost:3002" LOG_LEVEL: "debug" REMOTE_SITE: "Inari" MAINLAND_URLS: [MAINLAND_URLS] SERVICE_DISCOVERY: "cloud" TLS_UNPROTECTED: "world" DECRYPTION_SECRET: xxx ENCRYPTED_API_KEY: xxx IV: xxx -
Windows: If you have a preconfigured *.mst file for the remote site, open a command line and execute the following command to start the installer:
/i seal-island-checkout seal-island-checkout-x.x.x.x.msi TRANSFORMS=<island_configuration>.mstOtherwise start the installer by double-clicking it.
-
-
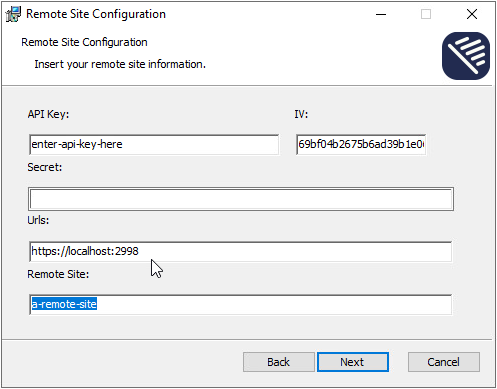
Enter the connection data:
API Key: API key for the remote site (leave blank in case of client certificate authentication)IV: IV for the remote site (leave blank in case of client certificate authentication)Secret: decryption secret for the remote site (leave blank in case of client certificate authentication)Urls: URL of the Output Engine system, accessible from the outsideRemote Site: name of the remote site
If you used a configuration file, you only have to enter the
Secret.No typos
The name of the remote site has to be exactly the same as used to create the API keys and as specified in the mainland configuration.
-
Confirm with
Nextand start the installation withInstall.Registry
The installer stores the connection data in the registry at
Computer\HKEY_LOCAL_MACHINE\SOFTWARE\SEAL Systems\seal-island-checkout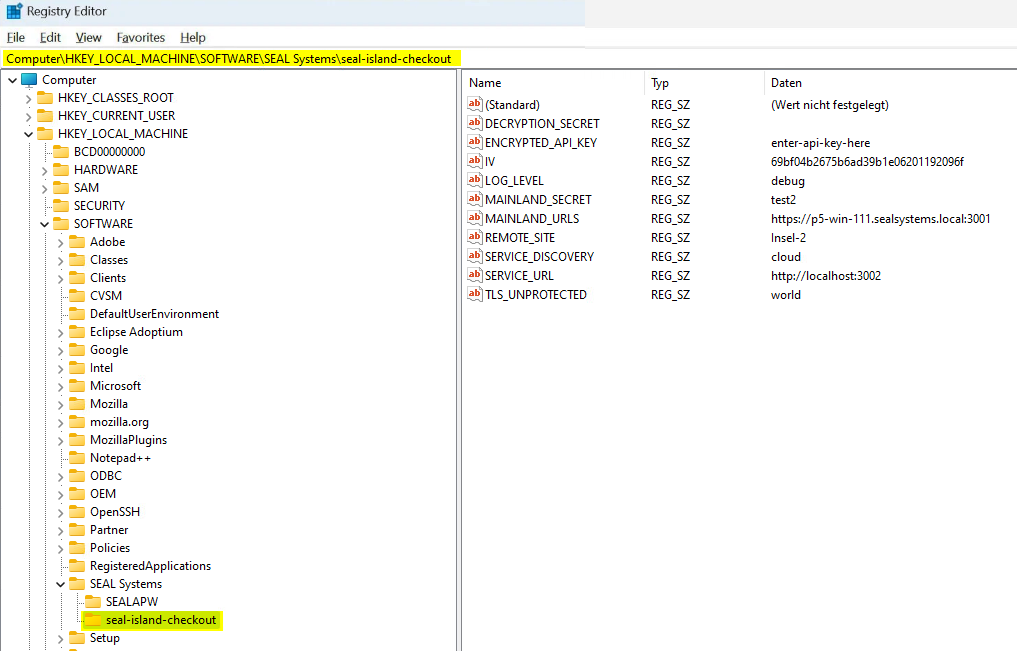
-
After the installation is finished, test the connection by clicking
Open Monitoror callinghttps:\\localhost:3002in your browser.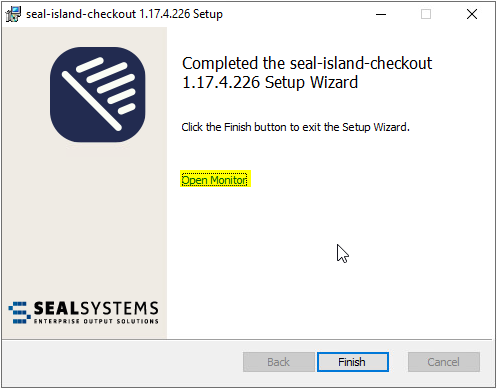
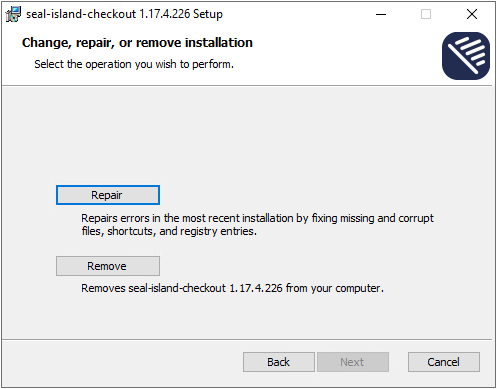
Modifying the installation
When changing the seal-island-checkout on a Windows client using the Repair option, default values will be written into the registry instead of the changed data. To prevent that issue, uninstall the current client first, then install anew.
Client Certificates (Remote Site)
-
If authentication via client certificates is configured at the main site, the remote site needs a client certificate. When issuing a client certificate for a remote site, the name of the remote site has to be used as the
CN. -
On the remote site the client certificate and the private key have to be provided via environment variables:
CLIENT_CERT: File name with full path of the client certificate or the certificate contentCLIENT_KEY: File name with full path of the private key belonging to the client certificate or the key content
-
Download the installation file for the
seal-island-checkoutfrom the SEAL Systems delivery platform: -
Start the client installation. The fields
API Key,IVandSecretcan be left blank.No typos
The name of the remote site has to be exactly the same as used to create the API keys and as specified in the mainland configuration.
-
After the installation is finished, test the connection by clicking
Open Monitoror callinghttps:\\localhost:3002in your browser.
Hint
SEAL Systems does not provide any support for distribution or management of these client certificates.
Modifying the installation
When changing the seal-island-checkout on a Windows client using the Repair option, default values will be written into the registry instead of the changed data. To prevent that issue, uninstall the current client first, then install anew.
Update
... With No Changes
Normal updates can be done by the customer themselves:
-
Download the installation file for the
seal-island-checkoutfrom the SEAL Systems delivery platform. -
Execute the installation file. The required fields are prefilled with the existing configuration.
... With Configuration Changes
If a remote site or parts of the security configuration have changed, the complete installation process has to be repeated:
Modifying the installation
When changing the seal-island-checkout on a Windows client using the Repair option, default values will be written into the registry instead of the changed data. To prevent that issue, uninstall the current client first, then install anew.